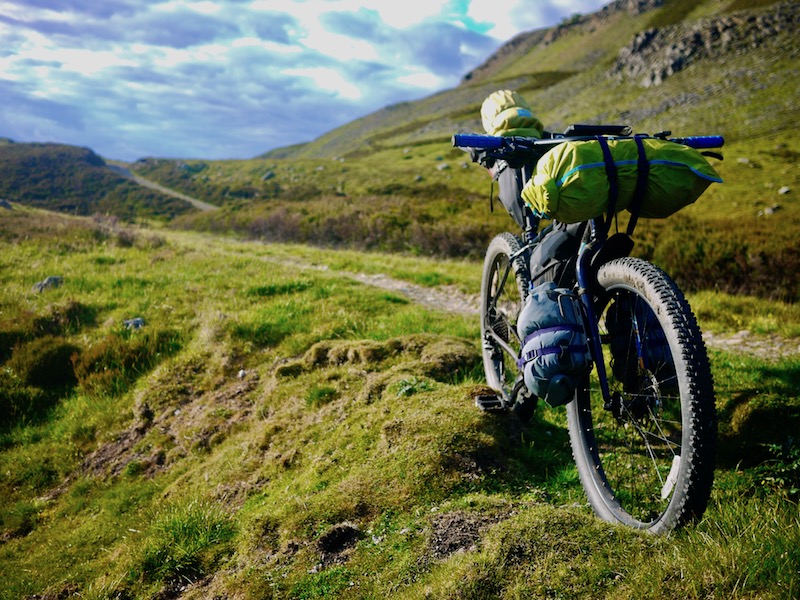
I was asked to review the Ruzer ‘Neutron Mini Blast’ pump at a very convenient time for me as I was in the market for a nice compact trail pump to take on bikepacking and mtb outings that wasn’t going to weigh me down and take up much space on my bike or in my bags….this most definitely fit the bill!
My topeak mini morph pump is great and very practical for commuting and longer tours, but for overnighters and quick blasts around the local woods on my trail bike I felt like it was overkill and needed (wanted) something even smaller and more discreet, but I got even more than that with this mighty little pump!
Full disclosure, the Ruzer team sent this bad boy to me to test and keep after reviewing, I always try and be honest in my reviews so if anything isn’t up to scratch I would actually point it out in the review though.
SPECS:
Length (closed) 17cm (6.9”)
Length (fully extended) 27cm (10.6”)
Weight 95g (3.35 oz.)
Max PSI 230
Valve type Presta/Schrader/Dunlop
A mighty powerful pump for it’s palm sized proportions!
PROS:
Extremely light
Streamlined so no hose or anything sticking out to snag
Metal construction feels very durable and sturdy
Super easy to switch between Schrader and presta
Surprisingly powerful!
Very short so easily fits in jersey pocket or top tube bag
Comes with lightweight well designed attachment bracket
Solid metal locking mechanism for attaching to valve
Very discreet in all black wouldn’t stand out on your frame
CONS:
Small size means slightly awkward to grip when pumping
Rubber seal to hold handle in place tends to slip away from handle slightly
May make a rattling noise on bumps from metal valve locking mechanism
DESIGN AND FUNCIONALITY:
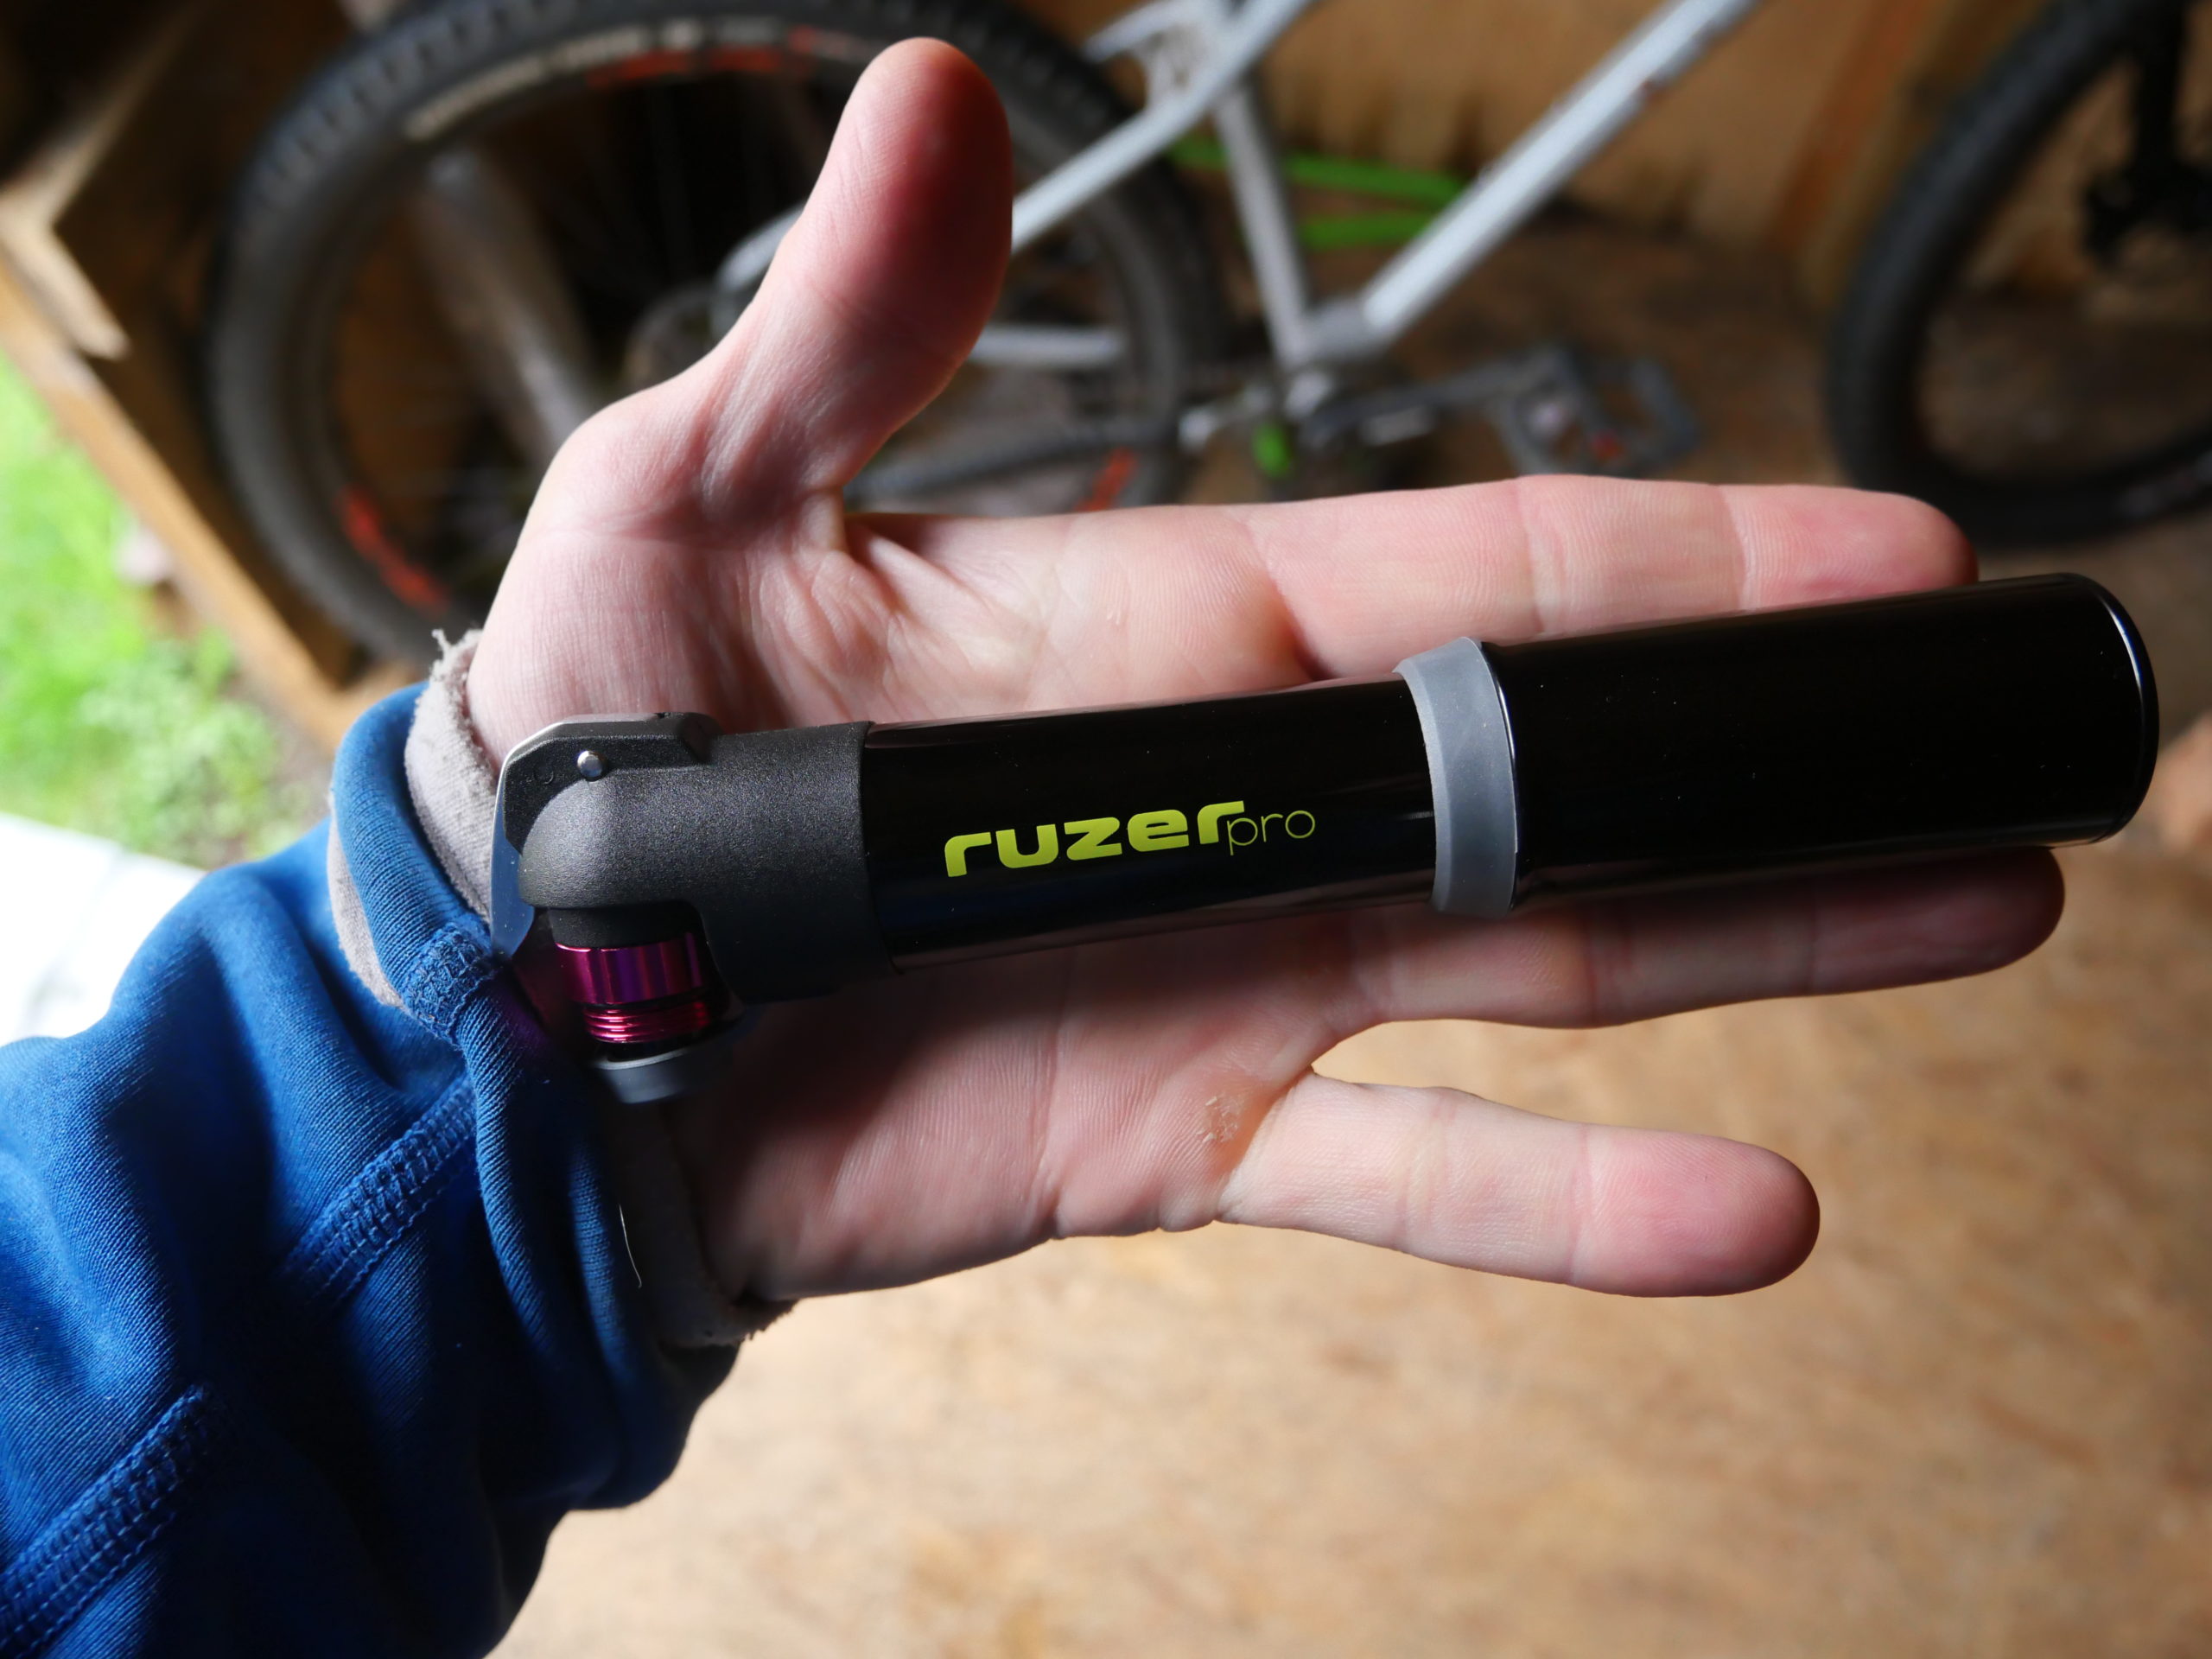
I was very impressed by the look of the Ruzer Neutron mini blast when I took it out of the package; it looks and feels satisfyingly solid for such a tiny pump. It’s super light but the weight feels just right, not like some plastic mini pumps or even other aluminum pumps that feel flimsy as if they’re going to fall apart in your hands at the first use.
It is very sleek and low profile and wouldn’t mess up the look of your bike if you choose to attach it to the frame with the provided bracket. Because it is such a sleek and simple design it would also slip perfectly into a jersey pocket and be easily retrieved without the risk of a hose snagging in the pocket.
I carried the Ruzer Neutron Mini Blast around on my commute to work and tried it in several different spots, each of which it fit without a battle to squeeze it into which was nice for a change. Easily slipped into the top mesh pocket of my Blackburn top tube bag, into my alpkit stem cell bag and when trail riding it disappeared into my Dakine backpack’s built in pump pocket. Very satisfied with how versatile it is and would feel confident taking it out on longer rides.
When I first received it I thought it would be a great emergency pump for trails and day rides, but due to the small size didn’t think it would really be powerful enough to take on extended bikepacking trips, but that changed when I had to fix a flat on my bikepacking rig that I have been using to commute to work recently.
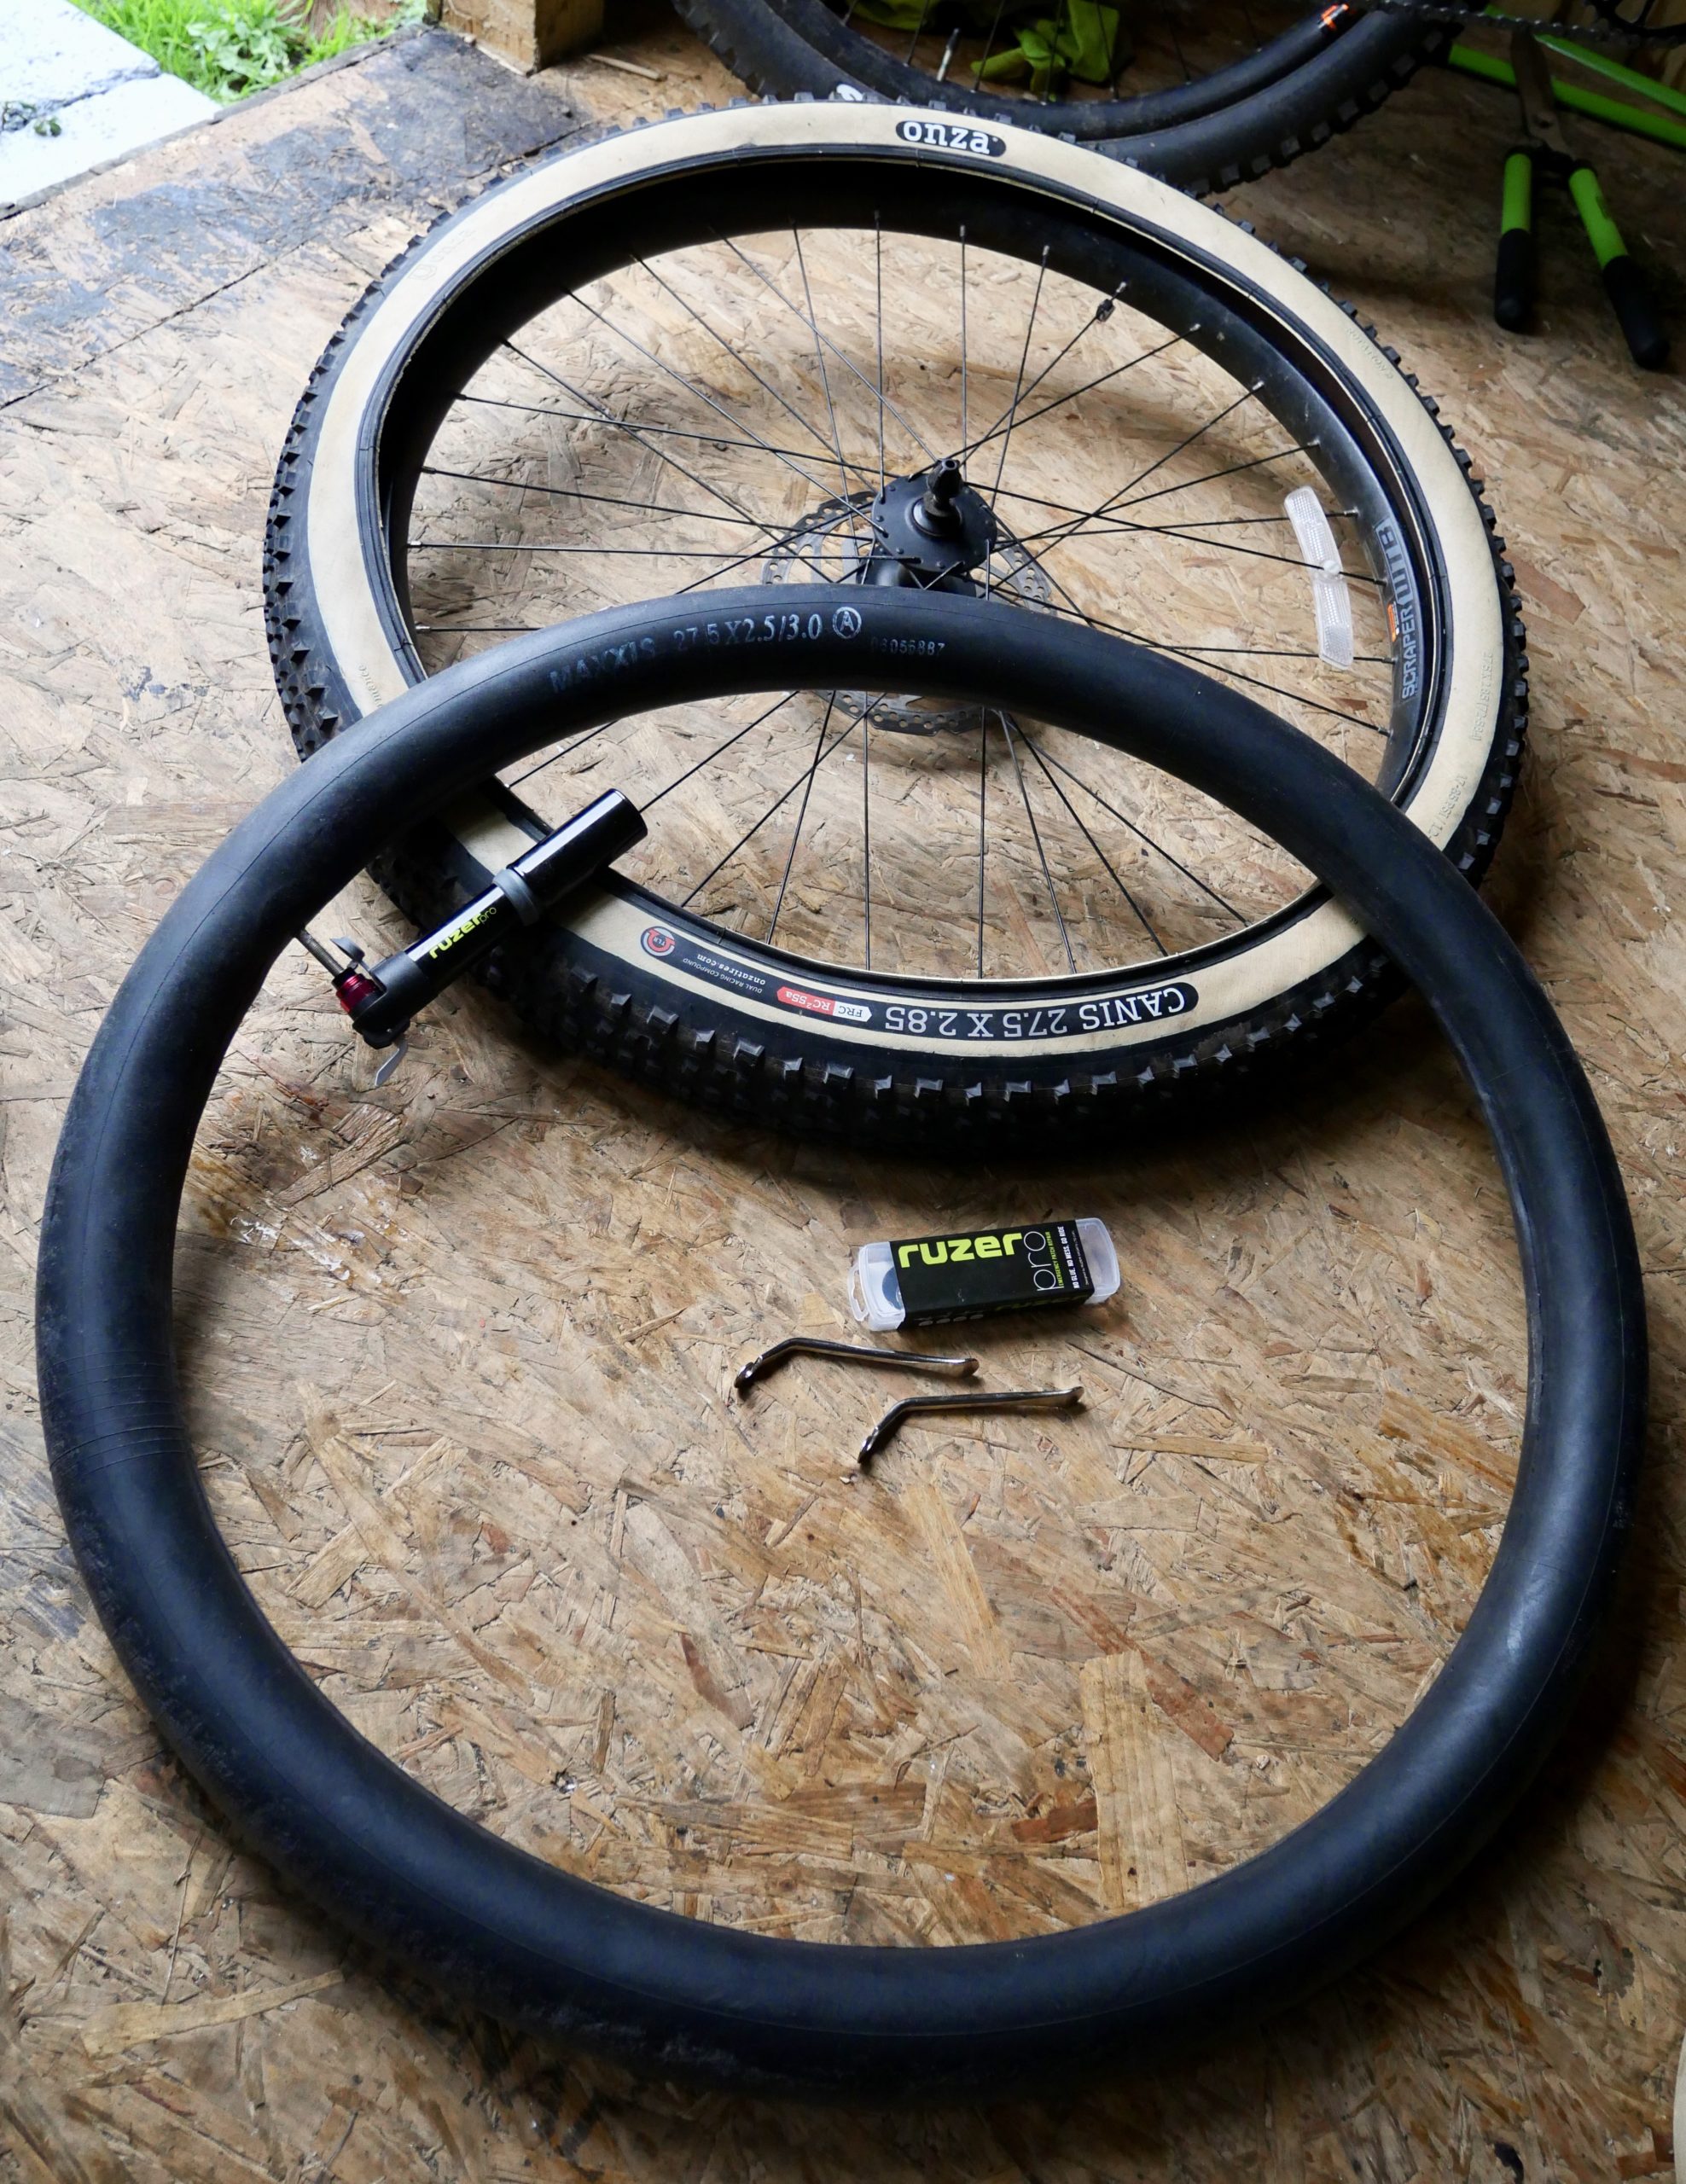
My genesis longitude is currently set up with 2.8’ onza canis tyres on WTB 27.5 scraper rims which I have found an absolute nightmare to get tyres on and off of and even getting them to seat properly has taken some pretty vigorous pumping to use the inner tube to push the tyre back into place after installing. I didn’t hold much hope that the Ruzer Neutron mini would have the pumping power to shift the tyre back into place on the insanely tight scraper rims….but I was wrong! The little Ruzer handled it with no issues at all, if anything I actually found it easier than using my topeak mini pump and my larger unbranded pump that has a flip out foot stand and handle that can fold out to get more grip. This was a big plus for me and changed the way I thought about it as I could now see it as a very viable option for bikepacking as I felt confident that I could be out in the middle of nowhere and it would have what it takes to give me any pressure I needed to force a tyre to sit on the rim properly.
I had strong doubts a pump this size could get these beefy tyres to seat properly, but it did the trick no worries!
Cool!! A tiny pump that actually has some guts!!
My only quibble with the pump is due to it’s petite size it can be a bit awkward gripping it when pumping, but this is true for pretty much all pumps of this size so you kind of have to expect it for any pump of these tiny proportions. The flipside of this is that because it actually has efficient pumping power it can get the job done surprisingly quickly so you won’t actually be holding it for too long…unless you own a tricycle and get 3 flats at once I guess.
DURABILITY:
I have only been trying the Ruzer Neutron mini blast out for a couple of weeks so I can’t speak too much about the long term durability of this little fella, but everything does feel well constructed and solid. One of the most impressive features would have to be the solid metal valve connecter that screws into the head and is reversible depending if you’re using Schrader or presta. Some other dual use pumps seem to use fiddly little rubber adaptors that you have to pry out and flip around and hope you don’t drop it in long grass or mud and lose when you trying to use it on the trail so I was quite happy to see this solid metal one piece construction of the adaptor. I was also very impressed with how quick and easy it is to unscrew the head and change what valve type you need.
SUMMARY:
There is definitely a lot more to this pump than I was expecting. I kind of had it in my head that it would arrive and be something that would be decent for an emergency trail pump mountain biking or good for a road ride where you’re trying to keep weight down, but maybe not as a ‘serious’ pump for longer trips or commuting. I was wrong though and I’m happy about it!
This will now be my go to pump for all types of riding, but particularly for my bikepacking adventures (if I get off my arse and organize one soon) as it is so tiny I will always be able to find a gap somewhere in my gear to squeeze it in, but can also feel confident that if I need it, it actually has what it takes to stand up to the rigors of a bike tour.
The pump is a available at https://ruzer.co.uk/product/neutron-mini-blast-pump-fits-presta-schrader-reversible-valve-230-psi-15-7-bar-portable-compact-easy-for-mtb-road-hybrid/
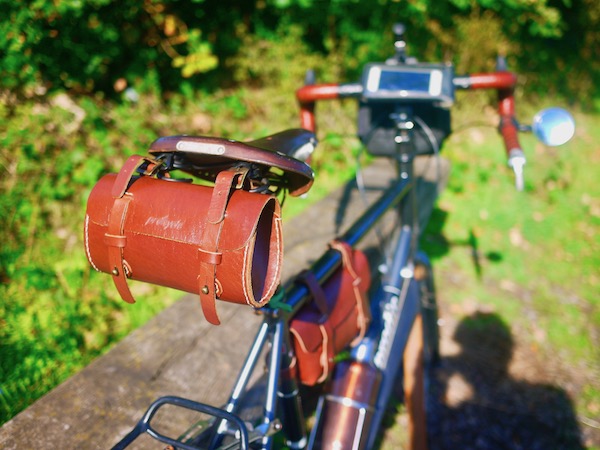
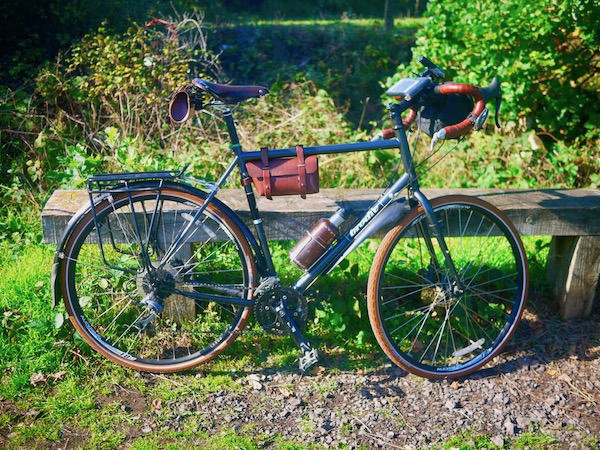
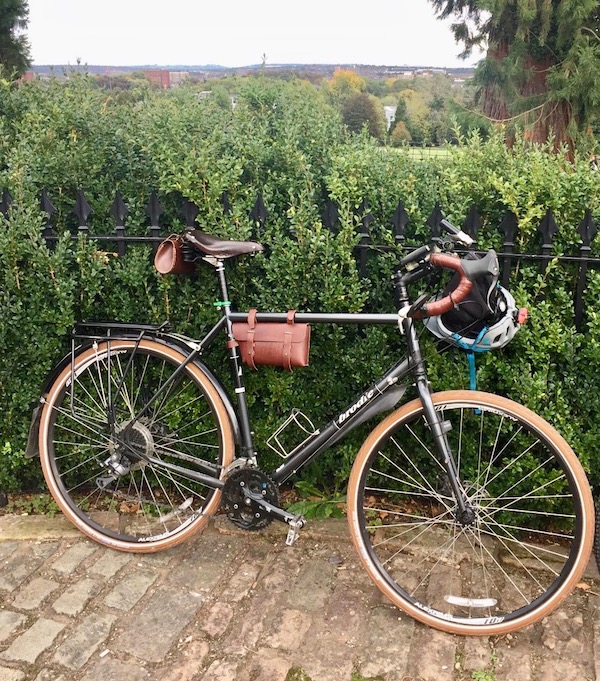
GALLEN LEATHER ‘CROSS BAR BAG’ AND ‘LARGE SADDLE BAG’
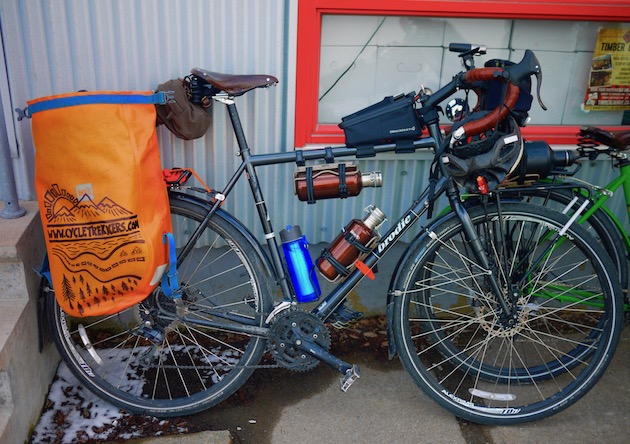
Galen Leather Bicycle Bags on my sexy Brodie Bike
SPECS:
(Cross bar bag)
Top 9.84” (25cm) Bottom 7.87” (20cm) Height 4.7” (12cm)
(Large saddlebag)
4” x 8” (10cm x 20cm)
Distance between straps 3.54” (9cm)
PROS:
Stylish on a city bike or classic touring bike
Leather is extremely durable and long lasting
Looks great if you have a brooks saddle!
Very high quality stitching
Simple opening / closure and easy to attach and take off
Thick strong material protects contents of bags
Can be wiped clean and won’t stain
Large enough to fit tools, tubes, plus most importantly…snacks!
The saddle bag can also be used as a handle bar bag if preferred and depending on your bikes frame size the cross bar bag could be mounted towards front of bike or as pictured near the seat tube
CONS:
Much like Brooks leather saddles probably shouldn’t be left in the rain too long
Stylish to the point that they might actually be a target for thieves in a city
Possibility that they could swing when loaded with heavy items
Maybe not my first choice for a long term round the world type tour, but would be great on multi day trips or commuting
OVERVIEW:
I was asked to review the Galen Leather ‘Cross Bar Bag’ and ‘Large saddle bag’ and have spent several weeks putting it to the test commuting and doing some long rides in and around the lovely city of Bristol in England.
I was very keen for these bags to arrive as I had just swapped out my Schwalbe marathon tyres after 1500km + for some new funky looking Brown Schwalbe delta cruisers and thought the colours would match and look pretty sweet especially with my brooks saddle. Yes I am a bit of a sad case and like colour coordinating my bike!
The Gallen Leather Bicycle Bags are hand stitched in Turkey, which is also a bonus to me being one of my favourite countries and a definite contender for my favourite country to cycle tour in!
I was not disappointed; the bags look fantastic and completely gave my bike a cool makeover, plus the quality is superb and adds some easy to access storage space for trips around the city.
DESIGN AND FUNCTIONALITY:
Both bags have been designed very well with the straps being long enough to wrap around a variety of tube sizes without being too long that they get in the way or rub against your legs when pedaling.
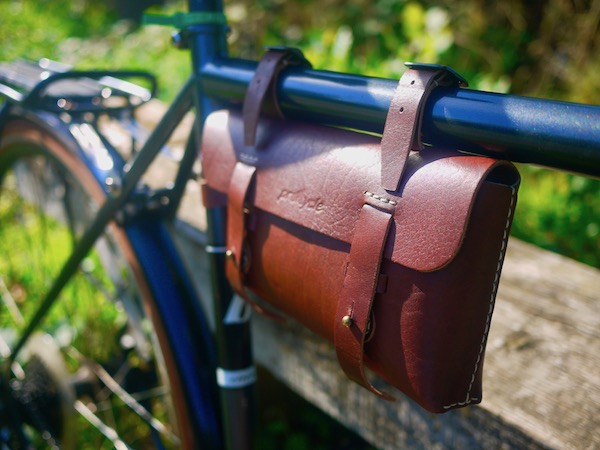
The size is also ample on both the bags and can easily accommodate a spare tube, multi tool and snacks. The Cross Bar bag is also designed with one straight end and one angled end that gives it an interesting quirky look. Two straps secure the bag to the top tube with a third on the side to attach around the downtube to stop it swinging side to side too much.
There’s definitely no danger of the bags opening on a ride as the straps are secured through a leather loop and a belt like button closure to keep all your goodies safe.
I was very happy to discover the Saddle Bag straps lined up perfectly with the loops on my brooks saddle so attached neatly and sat just right. I can see that possibly the bag could bounce around a little if loaded with heavy items, but as it’s only a small bag and will likely be holding light items like a tube and multitool it probably wouldn’t be an issue.
DURABILITY:
The most impressive part of the Galen Leather bags is definitely the quality and solid feel of them. The hand stitching is impeccable and looks like it would last a lifetime if cared for properly. The Galen Leather Bicycle bags are also treated with natural oils and beeswax to add an extra layer of protection against the elements.
Obviously only having rode with them for a couple of weeks I can’t really comment on how durable they are long term, but the leather is thick enough that I feel it would be very hard to damage these bags and they will most probably take quite a beating and come out fine.
The straps are made from leather the same thickness as the bag and are wide enough that I doubt they will ever tear or the holes stretch too badly which could be a worry on a thinner strip of leather.
SUMMARY:
So Far I have been very happy with the Galen bags and love the touch of class they bring to my slightly beat up touring bike. They definitely turn a few heads commuting around town, but more than just being pretty they do their job perfectly, stashing extra stuff for when I’m out and about around town but don’t necessarily want to take a pannier along for the ride.
I can quite easily fit enough snacks for a solid days riding in the Galen Cross Bar bag while stuffing patches, inner tube, a multitool and my brooks seat cover in the Large saddle bag.
I’ve been happy enough with the bags and am confident enough in the quality of them that I’m planning on trying them out on Kelly’s mountain bike on our next bikepacking trip as the cross bar bag should just squeeze into her small bike frame and give her some quick easy access to essentials.
Beautifully crafted, eye catching and gets the job done!
Material: 20D Ripstop Nylon with DWR water resistant coating
Filling: 3D Hollow Fibre Synthetic Insulation
Temperature Rating: 40°+ Fahrenheit (4 degrees Celsius)
Colour: Slate with Red Trim
Size When Spread Out: 54” x 80” (137cm x 203cm)
Size in Carry Bag: 9” x 17” (23cm x 43cm)
Weight: 3.3lbs (1.4kg)
Compact: Yes
Tear Resistant: Yes
Water Resistant: Yes
PROS:
Super soft comfy feeling material, not shiny and slippery despite being water resistant
Very spacious even for me at 6 foot 1
Very wide when unfolded so perfect for two people to sit on for a picnic
Can pack down quite small in a compression bag
Very warm as a blanket and big enough that it can wrapped around you like a sleeping bag when temperature really drops
Much easier to get in and out of in a tent than a sleeping bag
Can be thrown over two people comfortably
CONS:
Not quite as warm as a sleeping bag
Can’t be zipped up
Maybe a bit too bulky for long term cycle touring
OVERVIEW:
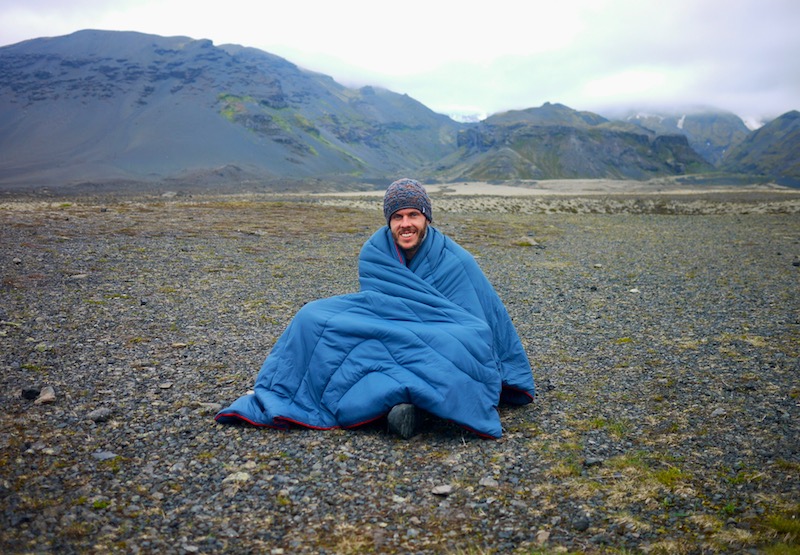
We were asked if we’d Review the Montem Sneaky Snuggler Camping blanket before we did a car camping trip around Iceland and I decided to take it along on a bikepacking trip as well around the Cairngorms national park in Scotland to really put it to the test!
The idea of a blanket for camping really appeals to me as I enjoy the comfort and ease of just throwing a blanket over me instead of zipping myself in and feeling slightly trapped. The blanket performed excellently for the car camping in very cold conditions in Iceland and even held up well to the slightly rougher and more rigorous conditions of a bikepacking trip in warmer weather.
DESIGN AND FUNCTIONALITY:
The Montem Sneaky Snuggler Camping Blanket is designed very well and feels lovely against your skin providing a bit of home comfort while camping. The stuff sack it comes with is very generously sized so it is a breeze packing it away and pulling it out once you’ve set up camp or decide on a suitable picnic spot!
Car Camping in Iceland! Sneaky Snuggler kept me toasty warm even when it got chilly in iceland!
Before our trip around Iceland I was slightly sceptical about the Montem Sneaky Snuggler Blanket’s ability to keep me warm if the temperature dropped close to zero, as I had never taken just a blanket camping before. It proved itself worthy on the first night of camping with temperatures dropping close to freezing, but I remained toasty warm simply by wrapping myself up in it tightly and tucking my feet in so my body heat couldn’t escape.
I loved the ease of just pulling it over the top of me when I was chilly without having to mess about with zips or zips jamming and particularly appreciated this when I needed to get up to go to the toilet in the night; much easier to get out of!
We also used it picnicking in parks across Iceland throwing it on the grass to sit on without worrying about getting too damp or dirty because of the water resistant coating, this is definitely a great feature and it makes it much more versatile than I first expected.
Montem Sneaky Snuggler blanket fit perfectly on my handlebars bikepacking the Cairngorms in Scotland.
Because of the generously sized stuff sack it is quite bulky when packed up, but for the bikepacking trip in Scotland I put the Montem Sneaky Snuggler Camping Blanket in a compression sack and was very pleased with how small it could be compressed down. It was easily small enough to be strapped to my handlebars without being to long and interfering with brakes, perfect!
It was extremely warm for Scotland when we were riding with temperatures reaching over 30 degrees Celsius, so I was very glad of having a blanket that I could easily vent myself with and kick my legs out when it was getting too warm without having to battle getting my feet out of like in a mummy style sleeping bag.
After 5 nights of bikepacking and wild camping I expected the blanket to be a bit dirty, but again the coating kept it stain free!
DURABILITY:
I found the Montem Sneaky Snuggler Camping Blanket to be very well made with quality stitching and the heavy-duty ripstop material feels like it will withstand any rough treatment you can throw at it, plus because it has no zips there’s not really much that can go wrong with it!
The DWR water repellent coating is definitely a very good feature for this blanket to make it more versatile so it can double up as a comfy picnic blanket without having to worry too much about it getting wet or any food spills staining it as easily as other materials.
SUMMARY:
Overall I have been very pleased with the Montem Sneaky snuggler camping blanket and it will now be my go to sleeping system for car camping and picnicking! For a round the world cycle trip I’m not sure it would be my first choice simply because blankets cannot compete with sleeping bags when it comes to warmth if the conditions get seriously cold as there is no way to trap the warm air in completely without zipping it around you so it wouldn’t be ideal for a trip where you could potentially run into some extreme weather. If it were a weekend away bike trip or a short journey locally then I definitely wouldn’t hesitate to bring this baby along for the ride!
It was lovely being able to snuggle up in the Montem Sneaky Snuggler at night as it really does feel like having a little slice of home with you in the tent. I also love that it is so multipurpose and can be folded out and sat on for a picnic or at a concert, thrown over yours and your partners shoulders or brought along on car camping trips as an extra layer either on the floor of the tent or over the top of two people if it is a particularly cold night.
I would definitely recommend the Montem Sneaky Snuggler if you’re not a fan of feeling trapped in a sleeping bag while camping or your looking for something a little more versatile! (Amazon)
• Very comfortable.
• Nice and warm.
• Small packed size for a full length mat.
• Very thick when inflated.
CONS:
• Expensive.
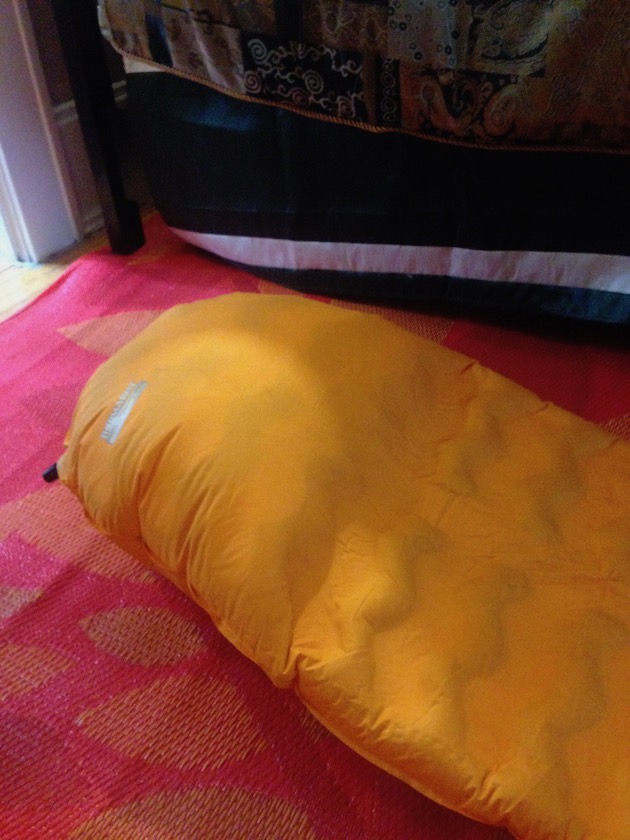
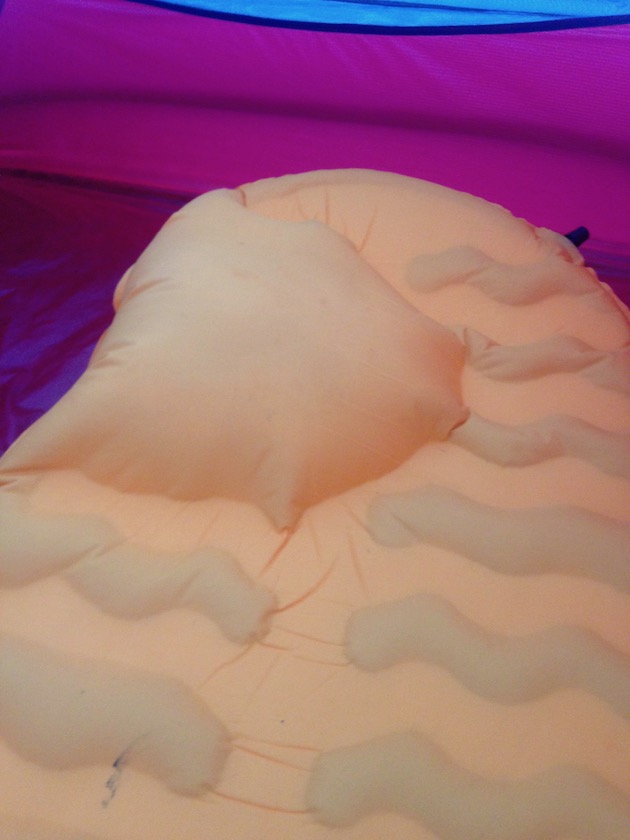
• Problem with outer material separating from inner causing a huge bubble to form making it unusable to use.
• Seemed to get dirty very easily.
The Therm-A-Rest when it first began to develop a bubble
OVERVIEW:
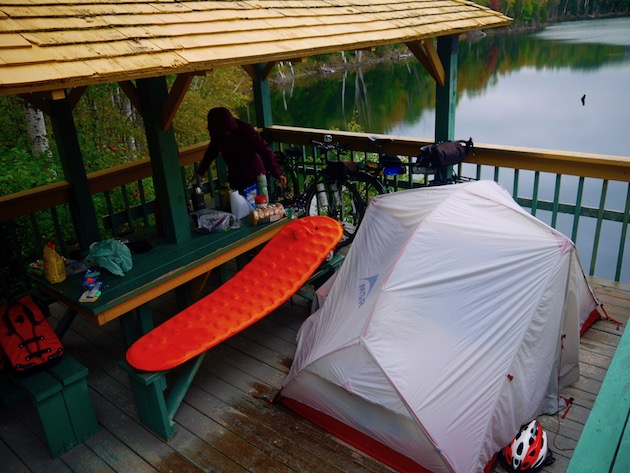
On our last cycle trip from France to China we had purchased the cheapest (and sometimes only) gear available to us and ended up with tiny three quarter length inflatable mats that didn’t really offer any barrier against the cold coming up through the ground, particularly on our legs which hung over and rested directly on the tent floor.
We started of our trip across Canada with these same mats, but decided after the Rockies we needed some more warmth and comfort so picked up the Therm-a-rest Evolite sleeping pad in Calgary to give our tenty home some cushiony luxury and warmth!
DESIGN AND FUNCTIONALITY:
The Therm-a-rest Evolite sleeping pad ticked all the boxes for us. Packed up small enough to not take up much space in our panniers, insulated to keep our body heat being sucked out through the chilly Canadian earth and long enough too fully spread out and get some actual sleep on!
These pads taper away towards the feet but just enough to shave more weight off without sacrificing comfort. The cushiony ripples along the pad are nice and squishy provide plenty of comfort, 5 cm thickness means when sleeping on your side you don’t feel like your shoulders are sinking into the tent floor.
You can see where the two padded ridges have joined up to form a bubble
DURABILITY:
The Therm-a-rest Evolite sleeping pad seemed very well made and feel nice and rip resistant, I felt confident about putting them down directly on the ground if needed while setting up the tent without fear of a twig or rock popping them and the seams all look nicely sealed around the valve.
Everything was going great…until Prince Edward Island when I noticed the gap between two of the raised ridges in the pad had disappeared and the two ridges had joined together. I though ‘oh well, not a problem, as long as it doesn’t get any worse…” Unfortunately it did get worse, a lot worse. Once the outer layer had started peeling away and joining up the ridges, there was no stopping it from coming away further every time I inflated it.
It was developing a rapidly growing ‘bubble’ in the pad around where my shoulders rest making it very hard to sleep on. If I took my body weight off the pad you could actually hear the outer layer peeling away and eventually making a loud popping sounds the bubble grew larger and larger like some heavily pregnant orange alien. You can’t sleep on a pregnant alien, everyone knows this.
Giant blister! Not much fun in the old shoulder blades!
In the end the bubble expanded to the very top of the pad making it impossible to use and actually played a part in our decision to cut the trip shorter than originally intended, as I was exhausted from lack of sleep. After reading more reviews online I discovered I was not alone and this seemed to be a common occurrence and fatal design flaw in this otherwise solid piece of equipment.
SUMMARY:
So close yet so far. I loved the comfort, packed size and weight of the Therm-a-rest Evolite sleeping pad, but I didn’t like the gigantic spine melting bubble that formed. If it hadn’t have had this issue I would have gladly called this my bed for the rest of our round the world adventures, but alas, it was screwed. We ended up returning both our pads (Kelly’s was fine but feared the same thing would happen eventually) to MEC where we purchased them from and settled on the more tried and tested Therm-a-Rest ProLite Plus Mattress instead as no reviews mentioned anything similar happening.
The Therm-a-rest Evolite sleeping pad gets 2.5 out of 5 for the major faults and discomfort it caused me. (Amazon/ Our Gear List)
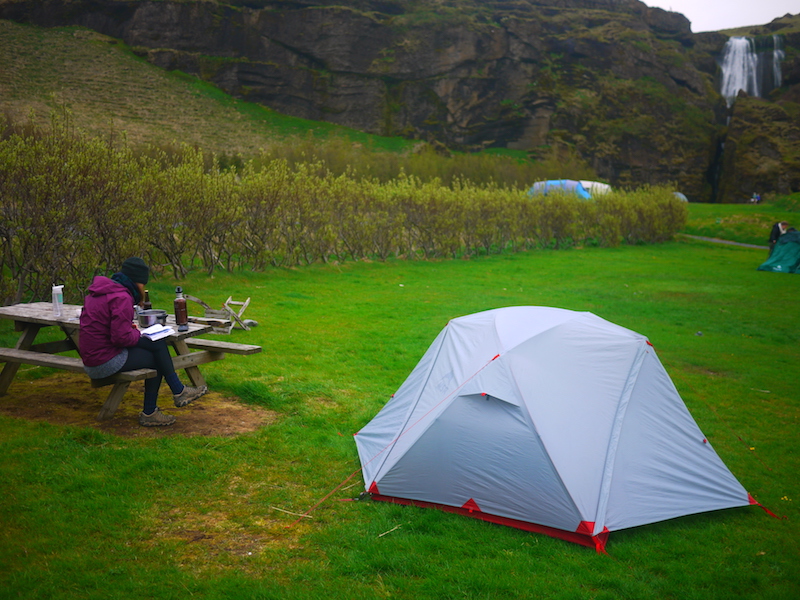
• Very spacious inside for two people with gear.
• Superlight weight and packs down very small.
• Sets up extremely quickly with option of inner first pitching which is handy if it’s raining!
• Freestanding so doesn’t need to be staked out if set up on concrete.
• Well ventilated, no condensation issues.
• Sturdy in high winds.
• Quick and easy to take down and pack into wide opening compression bag (included).
CONS:
• Expensive.
• Material is highly waterproof but feels thin and slightly fragile like it could tear easily.
• Two of our stakes snapped.
• Floor inside the tent was always slightly damp in the morning despite using the footprint.
• Cross pole on the top of the tent started to bend out of shape.
Plenty of space for two peoples panniers in the vestibules. Prince Edward Island.
OVERVIEW:
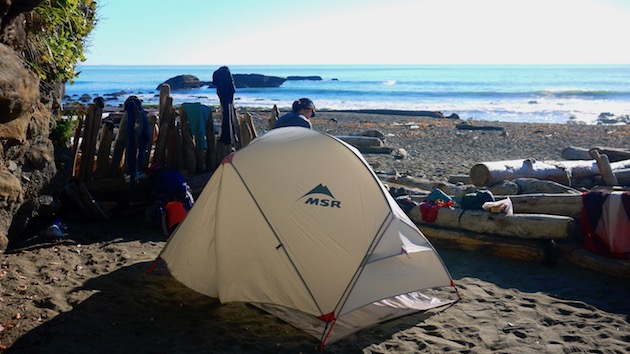
We purchased this tent in 2015 before doing the multi day ‘West coast trail’ hike on Vancouver island with the intention of also using it for our round the world cycle trip. The major appeal of the MSR Hubba Hubba NX 2 Person Tent for me was it’s tiny packed size, weight and excellent livable space inside so we wouldn’t feel cramped up after months at a time living in it while riding.
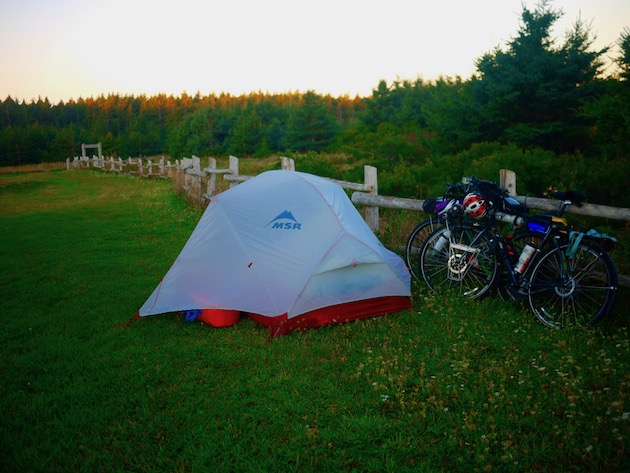
I love this tent, the design, the space inside and out and I wanted this to be our home for a long time, unfortunately it just didn’t seem to last and after 4 months cycling from Vancouver to Halifax we decided it wasn’t up for a round the world trip so we ended up returning it to the store we purchased it from.
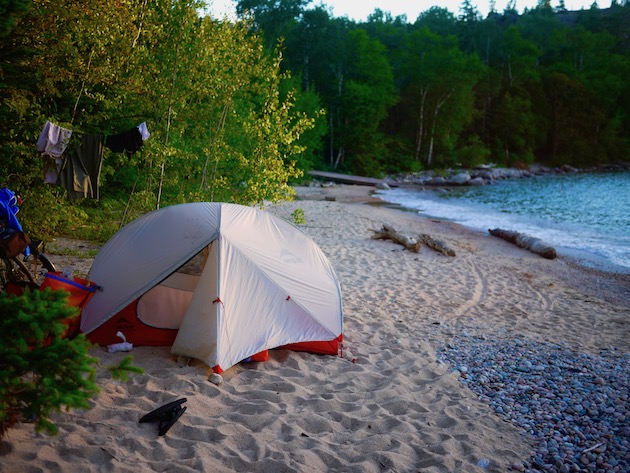
Lake Superior, having a freestanding tent helps when you can’t stake it out in beach sand!
DESIGN AND FUNCTIONALITY:
The design and layout of the MSR Hubba Hubba NX 2 Person Tent is extremely well thought out and works beautifully. You have a huge amount of floor space for such a lightweight tent, but the big bonus of this baby is the incredible amount of headroom and a feeling of space all around you due to the ingenious vertical sidewalls that the pole set up creates.
Many lightweight tents feel cramped and claustrophobic inside, but MSR managed to make the MSR Hubba Hubba NX 2 Person Tent feel like a mansion! We tried out several tents before purchasing this and have tried out many since to replace it, none of which felt as roomy. Several of the tents I tried were actually larger on paper, but when I got inside my feet touched one end and my head touched the other due to a classic ‘dome’ style slanting design as opposed to the Hubba Hubba’s vertical walls. I’m 6”1 and can comfortably lay down in the Hubba Hubba with a little bit of space at my feet for a small bag and we have a nice amount of room either side of us to not to feel like we’re fighting with each other for room.
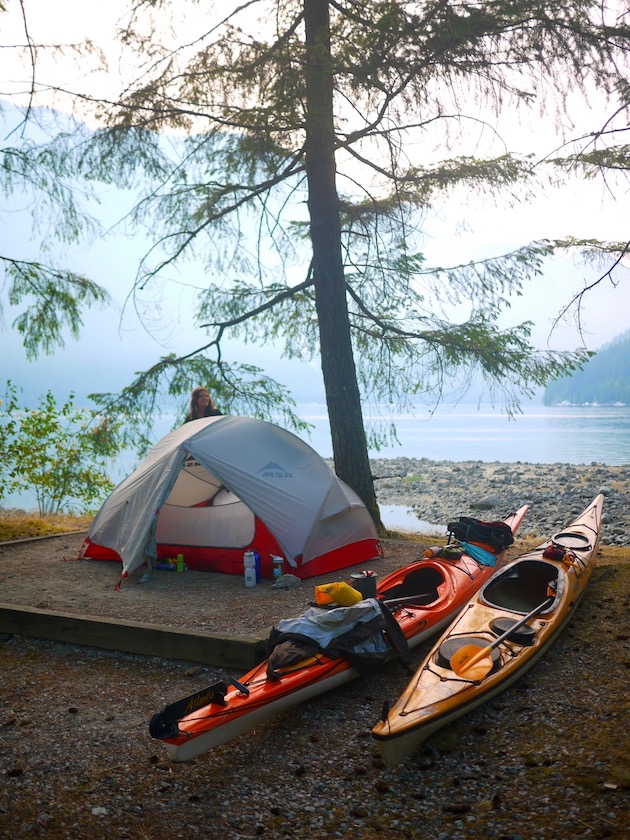
Kayaking in Deep Cove B.C
The single pole deign is very clever with a central hub connecting a cross pole in the centre to give you plenty of head room and extra stability with another hub each end for the vertical side wall pole pieces to pop into. The poles are made of DAC featherlite aluminum and easily connect with each other and are super easy for one person to connect together by themselves. After you’ve put it up a few times you’ll have this bad boy fully set up in 5-10 minutes…less if it’s raining and you’re cold!
There’s plenty of mesh on the inner tent so it feels nice and airy but still enough material to keep in warmth on chilly nights. Each end of the tent has added ‘kickstand’ opening for added ventilation and to achieve a cross breeze in warmer weather.
The large D shaped doors on either side are easy to get in and out of and have plenty of clearance from the ground so water shouldn’t splash in if you’re making a dash back in to the tent in the rain. Also has built in rain gutters that channel water away from the zips so you don’t end up getting drenched when you unzip the fly.
The two vestibules either side of the tent offers enough room for all of our panniers and would be plenty of space if you were using it for hiking packs. There isn’t a porch or enough room to safely cook in the vestibules, but definitely ample space for your gear.
There are two mesh pockets at either end of the tent to store bits and pieces, would have perhaps been better having the pockets on the sides instead of the ends so you don’t lose any length when the pockets are full.
DURABILITY:
The fly of the tent is made of 20 denier ripstop nylon rated to 1200mm waterproofness while the floor is made of 30 denier ripstop rated to 3000mm. we never had any issues with rain getting into the tent through the roof, but the floor always felt damp no matter how or where we set it up even using the MSR footprint purchased separately.
In order to achieve the impressively light weight, obviously lighter materials have to be used. For me the floor just feels a little bit too thin to inspire confidence and we were always slightly worried about accidentally ripping it. No rips or tears ever did occur in the tent, but no matter how it was set up I always woke up with a wet sleeping bag from the floor.
The plastic hooks used to attach the inner tent to the poles feel very sturdy and I doubt they would ever break unless you stood on them pretty hard and crushed them.
The DAC poles are crazy light, but feel very solid and kept the tent rigid and upright even in strong winds, unfortunately the crossbeam pole in the centre of our tent had begun to bend out of shape pretty badly causing a slight sag in the top of the tent. I don’t know if it would have ever actually snapped, but after 4 months on the road with another 4-5 years ahead of us, we didn’t want to take that risk.
The ‘mini groundhog’ stakes that come included with the MSR Hubba Hubba NX 2 Person Tent are super lightweight and work very well, but unfortunately the heads snapped off three of ours within the space of a few weeks so they definitely lose points there!
The included compression bag is a killer design making packing it away super quick and easy with two compression straps and a string and toggle to squeeze it all together nice and compact. Our bag had developed several small holes on the ends that concerned me; the bag appears to be made of the same material as the tent and if it developed holes that quickly then it might not be a good sign for the tent itself. I could be being a little unfair here as these holes did develop when doing the west coast trail which was pretty wild and rugged hiking where the bag probably took a bit of a beating on the outside of my pack.
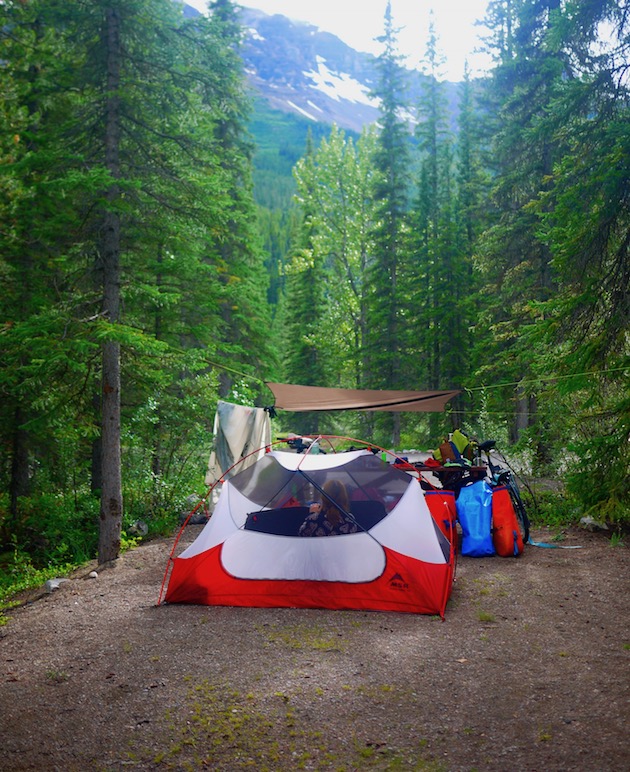
Camping in Jasper letting the fly dry out before fully setting the tent up.
SUMMARY:
I loved the SR Hubba Hubba NX 2 Person Tent . I wanted this tent to be with us forever, but in the end I think it was more suited to hiking and camping rather than a near permanent home that we were trying to make it cycle touring.
Design wise, there is very little I would change about this tent, for two people it hits that sweet spot between having enough space inside and not taking up a crazy amount of room to set up. When wild camping this can be a fairly important factor for choosing a tent as we tend to find ourselves setting up in a random tiny sliver of grass behind a bush on a backroad somewhere so a massive tent that requires a lot of space can be a drawback.
It’s packed size is truly impressive and fit perfectly on my front rack without the need to split the tent up or share the load by one of us taking the poles etc.
In the end the frustration at the leaky floor and our uneasiness with the bent pole made us decide to return the tent while still could taking advantage of Canadian outdoor store MEC’s excellent return policy.
To replace this tent was a tough decision as every other tent we tried after this paled in comparison. In the end we opted for another MSR tent, the Elixir 2 as it is extremely similar in design to the MSR Hubba Hubba NX 2 Person Tent, only made of heavier thicker materials. The weight difference is fairly significant (over a kilogram) and it doesn’t pack down as small, but we are hoping that the thicker materials make it longer lasting so we can enjoy our home for years to come on the road! When we’ve actually started using the tent I will post a review of the Elixir 2.
I give the MSR Hubba Hubba NX 2 Person Tent a 3 out of 5.
In many ways the MSR Hubba Hubba NX 2 Person Tent is my dream tent and it would have scored higher if not for the durability issues we had. Amazing tent for weekend cycle trips and hikes, but perhaps just not up to the rigors of long term cycle touring. (Amazon/ Our Gear List)
Price paid; $850 Canadian dollars, no tax paid! RRP was $1120+tax so I scored a bargain as it was the previous years model and I bought it from outside Canada I didn’t have to pay tax. Woohoo!
Note: I am pretty clueless about technical bike stuff so I have no idea what any of the specs mean, so this review will just be pretty basic about what I like and don’t like about my new baby!
PROS:
Outstanding price for a Chromo touring bike with disc brakes.
Nice upright position, good stem angle.
Wide drop bars giving plenty of hand positions.
Brakes feel solid and dependable when fully loaded.
Looks like a sexy old school classic tourer.
Bar end shifters kick ass!
Rims take up to 38c tires.
Mid blade fork braze ons for front rack / fenders.
Three bottle cage spots.
24 speed.
CONS:
Slightly wobbly fully loaded (but this was EXTREMELY fully loaded at the start of trip before I got rid of excess crap).
Although it can take 38c tires it gets pretty tight with fenders.
Paint seems to scratch very easily, cables on head tube rubbed the paint on the logo completely off.
Snapped two gear cables and the chain in 4 months, never had any problems like that on our previous trip with cheap hybrid bikes in worse conditions.
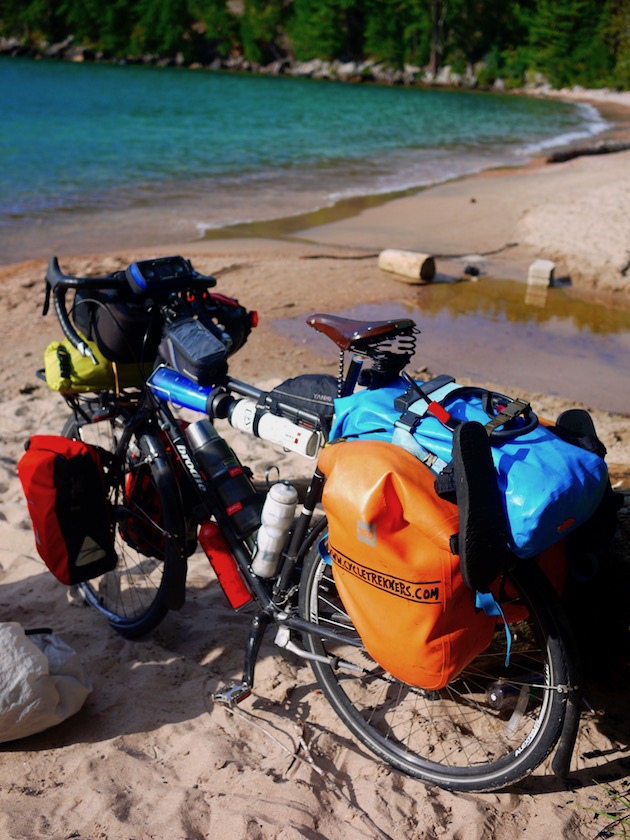
Lots of space for water bottles on a 60cm frame! Lake Superior.
OVERVIEW:
Our previous cycle tour from France to China had been done on a pair of second hand ex rental Trek hybrids that were too small for me and too large for Kelly. So this time I was determined to get bikes that were more up for the task of riding around the world! I had my heart set on a steel framed tourer this time as we would be travelling in so many different conditions that I figured the sturdiness and durability of steel made sense.
I researched the options for buying touring bikes at home in Perth, Western Australia, but our options were fairly limited, more expensive and when you add in the cost and hassle of transporting them to Canada by plane it made more sense to buy bikes in Vancouver at the start of our trip.
I researched as many bike shops as possible in Vancouver contacting a whole bunch and ended up being offered the bargain price on the Brodie Circuit 2015 with the added bonus of not having to pay tax as the purchase was made outside Canada. Kelly’s original bike was a Norco Search from the same shop, but this didn’t work out as I think has been covered in previous posts and she ended up getting the 2016 flat bar model of the Brodie Circuit that I’ll cover in a separate post.
DESIGN AND FUNCTIONALITY:
The Brodie Circuit 2015 was exactly the bike I’d been hoping for with my limited funds! I spent hours staring at the pictures on the Brodie website and from the bike shop, but it is still a bit nerve racking purchasing a bike that you intend to ride around the globe without ever actually trying it out first!
I was thrilled to finally see it up close in the shop and over the moon to find that it was actually a good fit for me! I was in love.
The angle of the stem puts you in a nice upright position for long days in the saddle and the nice wide drop bars means you have a fair amount of space for a handlebar bag without losing hand positions.
The curve and length of the drops are excellent making it nice and comfortable cruising along in the drops without feeling like you’re hunched over too much.
Finally having a bike large enough for me felt great, everything just felt right. The bonus of having a 60cm frame is plenty of room for water bottles! One design flaw for me was the placement of the main bottle cage on the seat stay, using a standard top release aluminum cage; the cage actually interfered with the shifting of the front derailleur. I remedied this easily by bending the cage slightly, but the cage mounts could have perhaps been placed slightly higher on the frame to avoid this interference.
Front and rear facing eyelets on both the fork and rear give multiple rack set up options along with mid blade braze ons on the fork giving added mounting versatility.
It rides beautifully. I hadn’t owned a steel framed bike before and could definitely notice the difference in handling particularly on bumpy roads, the steel seemed to keep me a bit more stable and jarred less when hitting rough patches.
I never felt like I’d run out of gears on this bike, even in the Rockies I felt 24 was enough to get me up the steep passes, I also like that an 8 speed chain and cassette is relatively easy to get a hold of when in random spots around the world.
Can’t comment too much on the stock saddle and tires (Brodie saddle and Kenda Kwest 35) as I swapped them out straight away for my brooks B67 and our Schwalbe marathons, but the saddle did seem decent to be fair.
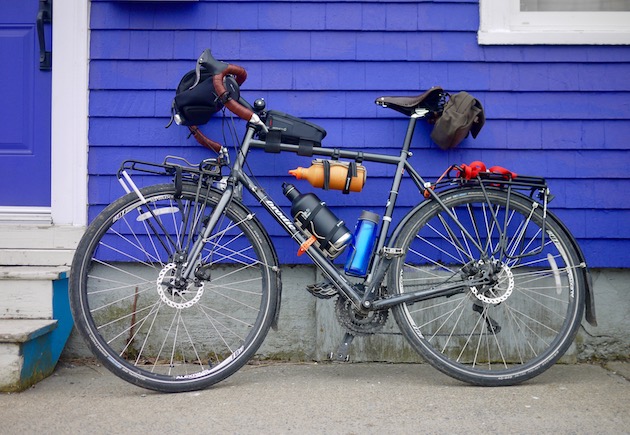
Racked up and waiting for the next adventure!!
It looks sextacular. I will not lie. I have a total man crush on my bike. The dark grey paint job with white Brodie logo looks great and gives it an old school charm. While it looks like a classic road tourer, it actually handles light off road and rocky tracks like a beast too!
DURABILITY:
The Brodie circuit 2015 feels like a serious touring bike when you hop on. The weight of the bike and the beautiful neat welds inspired confidence in my shiny new machine from the first meeting!
The Alex rims took a fair amount of punishment on some of the rougher cycle trails we chose to take and came out unscathed. At the start of the trip I had a ridiculous amount of weight on the rear rack and had feared that I’d end up busting a rim, but they held up beautifully. I’ve since scaled back the crazy amount of crap I was carrying to a slightly more sensible load.
Light rust developed in some of the braze ons, but that’s kind of to be expected being left out in rain and frost across Canada so I’m pretty sure any bike would develop a minor amount.
The paint job while looking fantastic, it does seem to be fairly fragile and it didn’t take long for scratches to appear. The major paint problems were from the gear and brake cables rubbing on the head tube of the bike giving the Brodie ‘B’ logo a nasty scar straight through it. Also had paint rub off under the straps of my top tube bag, I’ve since used tremclad rust proof paint over the patches, but I was hoping the paint job would be a little tougher.
I also managed to wipe out pretty badly in the Rockies while trying to take a photo while pedaling (yeah I’m not the brightest) but the bike took this pretty solid hit and came out fine!
My bike has been converted in to more of a beer transporting machine since living in Halifax!
I was surprised to snap a chain so quickly on this bike and go through two gear cables, but I am putting that down to the insane load I was trying to carry so can’t really blame that on the Brodie Circuit 2015.
SUMMARY:
Overall after 7000+kms I am super happy with the Brodie Circuit 2015 touring bike! It handles beautifully, feels solid like it will last me for the next 4-5 years of this trip and beyond and is also versatile enough that it can be used on road and also on trails making our route choices more open. I feel incredibly lucky to have picked up a brand new 4130 Chromo touring bike with all the bells and whistles for $850 and even if I did pay full price it would have still been a solid choice.
It was also kind of nice riding across Canada on a Canadian bike!
I give the Brodie Circuit 2015 model a 4 out of 5 stars. Excellent value and a solid touring machine! (Gear List)
VIVE LE QUEBEC! ROLLIN’ FREE LIKE A WHEEL OF CHEESE THROUGH A TASTY LITTLE SLICE OF EUROPE IN CANADA!
Our introduction to this delicious, cycle friendly, French Canadian beauty was an easy 120km day that flew by like a breeze! 72km of which was on the Prescott Russell Recreational trail. Winding through forests and along old railway lines where we finally cracked the magical 5000km mark!
Every single Canadian cycle tourist we had met so far across Canada had been from Quebec. So we were pretty sure it was going to be a good place to be on a bike and we definitely weren’t disappointed!
Global Citizen Festival
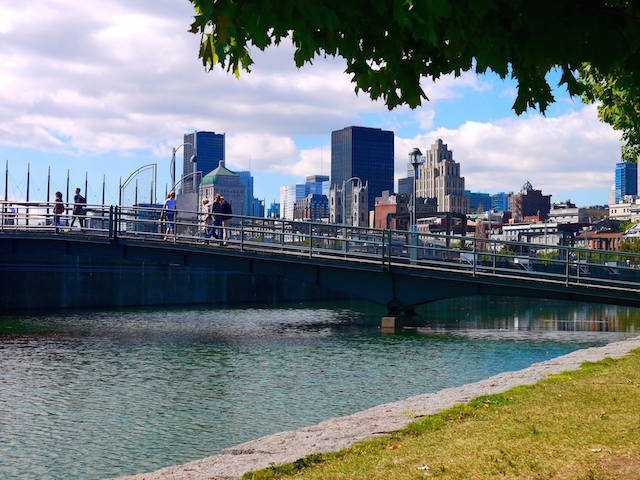
We had a few days off the bikes planned in Montreal where Kelly’s brother Michael was meeting us and had hooked us up with some free tickets to the Global Citizen festival that he was helping organize. So instead of being sweaty cycling bums living in a tent, we spent 4 nights camped out in an airB&B apartment drowning in beer and living like rock stars with VIP backstage tickets to a music festival and all the booze we could fit in our bodies!
It was definitely a different experience and quite surreal being backstage at a fancy pants festival and after party, but it was nice to change it up a bit and break the routine of cycling. Also beer is pretty good stuff and tastes even better when free.
After several days exploring Montreal and pretending we were back in Europe. Sipping espresso and munching fresh baked goods at patisseries. It was time to load our food bloated carcasses back onto the bikes!
[ctt template=”8″ link=”4_c4v” via=”yes” nofollow=”yes”]It was time to load our food bloated carcasses back onto the bikes![/ctt]
I was nursing a large hangover from the after party that we attended until 3am. We had to hit the road again at 9am, but my boozy blues were made more bearable by the scenery and excellent roads.
Montreal, Quebec
Quebec by Bicycle
Camping was occasionally tough as all space along the river to Quebec City seemed to be crammed pretty tight with homes on the waterfront, but we got creative sleeping behind a massive garden hedge on one night and outside a B&B on another slightly awkward occasion. The owner had approached us when he saw us eyeing up a nice juicy patch of grass outside the closed tourist info centre in a small town. He asked us in broken English if we wanted to stay at his house. Of course we did! Score!
When we got back to his ‘house’ we realized it was actually a bed and breakfast and he was in fact trying to get us to stay inside as paying guests. Some awkwardness ensued as we spoke with his wife inside, but in the end they turned out to be cool and let us camp in the garden for free instead of paying to stay inside.
Quebec City and Bicycle Trails
We had another little break in Quebec City, staying with a Warmshowers host Maude in her apartment with a huge garden in the courtyard. Maude was an ‘urban gardener’ and had created a huge veggie garden in her courtyard. She also had other projects around town building gardens in office blocks and government buildings. We were happy because we got to munch fresh veg for a few days instead of instant noodles and pasta!
Quebec was a super touristy town, but it was a nice place to chill out for a couple of days and soak up some of the European vibes, and to relax in coffee shops before hitting the awesome cycle trails again. From Quebec City we opted to catch the ferry to the other side of the Saint Lawrence River and rode along the scenic trails whenever possible. Exploring Quebec by bicycle was what I had pictured cycle touring to be before our first trip from France to China a few years ago. Relaxed car free cycle routes winding through forests with free rest areas to camp.
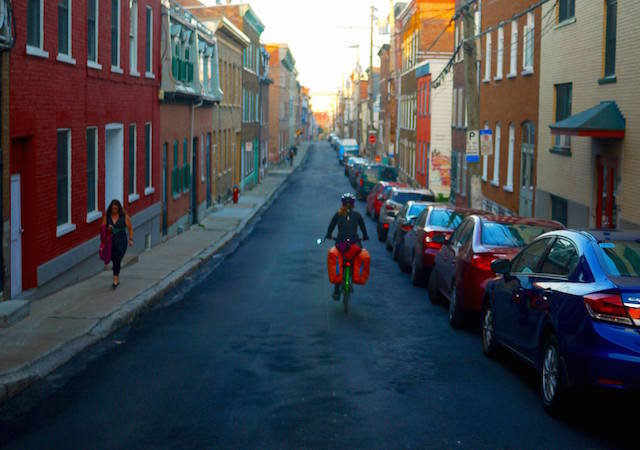
Cycling through the streets of Quebec City
La Route Verte
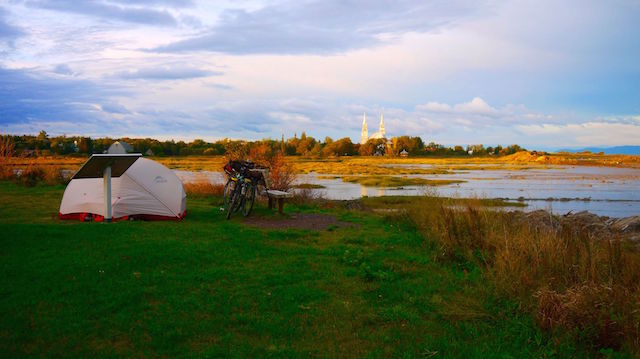
The Route Verte through Quebec was a definite highlight of our trip across Canada. It made the wet and cold weather a little more bearable, as we always knew we’d find a little picnic spot or even a designated cycle camping spot to pitch the tent at the end of the day. The temperature had suddenly dropped significantly as we were approaching the New Brunswick border and on our last night in Quebec we had by far the coldest night of the trip. We woke up to a tent covered in a thick sheet of ice and all our water bottles frozen solid.
Awesome camp spot just off the bike trail in Quebec
It wasn’t all doom and gloom though, we got to sleep next to an old world war II bomber in a park on the cycle route and had a fantastic sunrise to thaw out our gear and bone marrow!
It was now time to tackle our seventh Canadian province, New Brunswick and try not to freeze our bits off on the bikes!!
[ctt template=”8″ link=”0EA6g” via=”yes” nofollow=”yes”]Lets try not to freeze our bits off on the bikes!![/ctt]
Vive Le Quebec, Vive le fromage and route verte cycle path!! I hope you enjoy Quebec by bicycle!
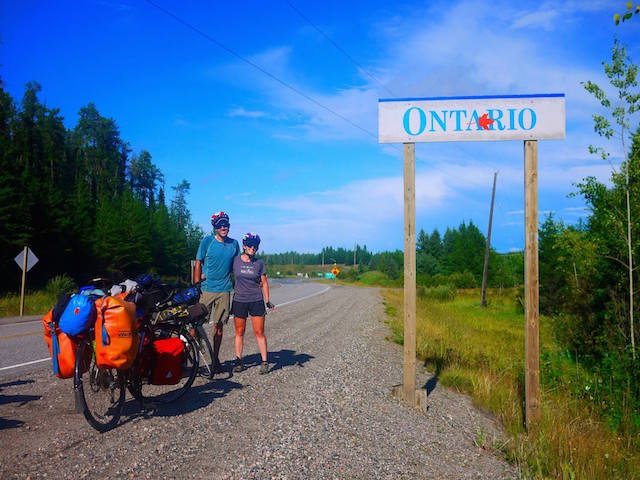
No I in fact was not born in Ontario, but as soon we entered this freaking huge province Neil Young’s ‘born in Ontario’ was playing on repeat in my head. This became our theme song for our epic 32 day stint crossing this huge beautiful beast! I spent the next month exploring Ontario by bicycle, annoying Kelly by constantly singing, humming and playing this song on my speakers. Sorry about that!
[ctt template=”8″ link=”Fdst5″ via=”yes” nofollow=”yes”]I was born in Ontario[/ctt]
To get from Manitoba to Ontario we had to dip into the good ‘ol U.S.A (just the way the road was) for a quick 60km detour through Minnesota and directly into the path of a huge storm that apparently blew some trucks off the road into a ditch. As we were on bikes, and not quiet as heavy and stable as trucks, we took shelter in a bar to dry ourselves off. This is where I ordered the most disappointing snack of my life! Never order cheesy chips in the states. It will crush your soul. Not an actual potato in sight, merely some weird shitty circular corn chips with poisonous orange cheese whizz spunked on top. Saddest day of my life.
I recovered from my shit chip experience and we hopped the border back into Canada to begin penetrating the moist mass that is Ontario!
Emo, Ontario by bicycle
We passed through friendly little towns including the hilariously named (I thought so at the time) ‘Emo’ in which I took a picture of pretty every street sign and advertisement with ‘Emo’ written on it.
We managed to bump into our German friends Jacque and Luisa again! Had fun camping in Fort Francis at a weird massive public park that also doubled up as a campsite next to the train tracks and river. We had a few beers to relax and catch up with our friends in the third province we’d seen them in!
Fort Francis was the point we had to decide if we wanted to cycle the southern side of lake superior in the U.S.A or stick to Canada and take the northern route. After much debate we finally settled on sticking to the Canadian side seeing as the whole trip was supposed to be about cycling the whole way across Canada! It meant we wouldn’t get to visit my friend in Minneapolis, but that was going to be a pretty massive detour and eat up a fair amount of our time, so it was back to cycling as a group again! Jacque and Luisa were heading the same direction so we had some travel buddies for a few days.
On to Thunder Bay
Over the next few days we rode some beautiful but isolated stretches of road together. We slept by lakes, in parks, outside a friendly ice cream van, saw the amazing Kakabeka waterfalls and swam in the freezing water at the end of the day and continued our constant battle with the asshole mosquitoes.
One night we decided to try riding down a long dirt path to see if we could camp near the water on the Seine River First Nations reserve. The super kind people welcomed us is in and let us set up camp at the Pow Wow grounds. They even unlocked the community centre for us so we could have a shower! Cool experience and one of the most scenic spots we camped at in the province.
Finally rolled into Thunder Bay for a few days off the bikes and stayed with the amazing Frank from Warmshowers. Despite being busy organizing a group cycle trip and dealing with a leaky basement and renovations, this champion not only let the four of us stay in his place but also another German cyclist called Mike. 5 people at once in the one house is a pretty generous move!
Camping at the First Nations reserve
Rest days when on tour
We had a great time together though and spent a few days preparing group feasts, sipping beers and rum, exploring the town and brutally savaging a Japanese buffet to within inches of it’s life!
I had a few bike maintenance things to take care of so we ended up spending an extra night with Frank. Our German buddies left to get a bus for a section of lake superior as they had to meet some friends.
Storms, road works and Lake Superior
We were recharged and ready to rock through the rest of this beast of a province! Just outside Thunder Bay I randomly spotted a brand new IPhone on the side of the road, which started ringing as soon as I put it on charge when we stopped in a park for lunch. I managed to score a $60 reward for returning the phone to the owner! Bonus! Felt nice earning some cash instead of watching it hemorrhage out of my account for a change.
Had some rough days dealing with construction work and torrential rain around Nippigon and didn’t feel particularly safe riding some sections with the lack of hard shoulder, but the scenery definitely made up for it.
Our first glimpses of lake superior left us awestruck and glad we had chosen the mighty northern route. It was hard to believe that was a lake and not a friggin ocean! We spent night after night in spectacular camping spots on the beaches and in the woods around the lake and fell in love with the area. It is a very nice feeling knowing at the end of the day you’re going to have crystal clear fresh water to swim in and clean yourself up after a sweaty day climbing hills on the bikes.
More friendly people
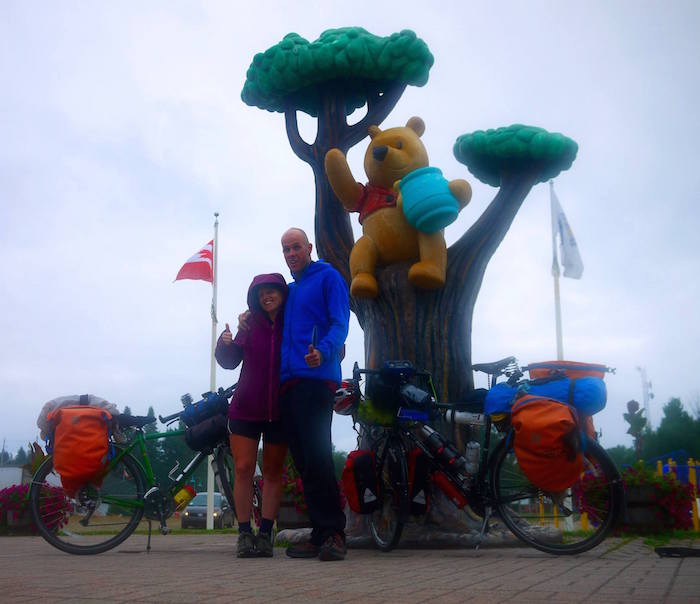
We met plenty of awesome people who helped us out. A couple from Germany with a holiday home let us set up camp in the front yard near Jackfish lake. Lloyd, a couchsurfer in Marathon who took us in and gave us a spare room for the night. The tourist information in Winnie the Pooh’s hometown of White river let us sleep outside the centre. And, probably the best of all was a legendary Hungarian Canadian guy called Zoltan and his beautiful family who we met outside a supermarket in Wawa and offered to let us camp on his front lawn.
When we followed him home he then decided to set up his camper trailer for us to sleep in! So we had a nice comfy bed, shelter from the mosquitoes and even got to wash our clothes and have a shower! Meeting kind and generous people like this make the trip so much more memorable and make me thankful we have the chance to travel like this and meet so many cool characters!
Zoltan from Wawa
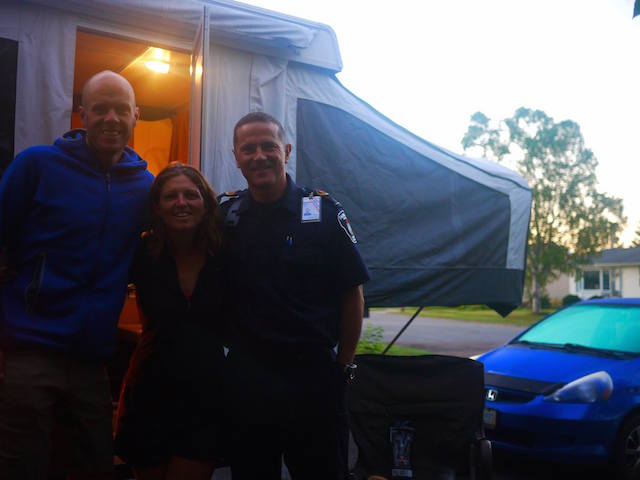
One night on Batchawana bay we were even invited in to the Wild Rose RV park and given a place to camp for free by the owner. He had noticed us eyeing up the beach for potential spots to pitch the tent as he knew the police would definitely move us on like the smelly bums we are, so he just let us come in and stay for free! Generosity runs deep in Canadians!
Sault Ste Marie and more awesome people
We were finally pulling away from Lake superior and rolled into Sault Ste Marie where we spent two nights with awesome warmshowers hosts Jeff and Juanita. We ate excellent home cooked meals, tried many kick ass local craft beers and got to try out Jeff’s Recumbent bike. Definitely not for me but I could see the appeal of sitting back like that and cruising along with a beer in each paw.
We decided to spend a night outside the local bike shop Velorution as they have set up a free campsite specifically for cycle tourists! Cool experience and a wicked idea, they had fire pits, furniture that guests had made from old pallets and a box of free gear other cyclists had donated. We even raided the massive stack of old bike parts outside the shop to use a rim and spokes as a grill for our zucchinis! Not a sentence I ever thought I’d be writing!
Hitting the road again
From Sault St Marie we passed through Many Amish communities where we’d stop and buy fresh veg and homemade cookies. We camped outside information centres and in the old fairground at Spanish where the harbor master let us pitch a tent and take a shower in the marina office. In the morning we woke up to see a porcupine climbing a tree next to our tent! Still no moose sighting, but I was pretty happy seeing this spiky fellow doing his thing!
The roads in Ontario were generally in pretty decent condition, but hard shoulders seemed to disappear for stretches. Instead of Ontario by bicycle, it could have been Ontario by pot hole. Road works were constant with crazy fast drivers flying past us and leaving us a little rattled at times. We had a particularly rough day with the roads on one occasion when an amazing lady called Patti saw us looking fed up and broken on the side of the road. She pulled over and offered to let us stay at her place. The only catch was we were shattered and ready to find the nearest park to sleep in. Her place in Sudbury was still 30km away and would have been dark by the time we arrived.
Patti was also a cyclist and had a bike rack on her car, but it could only fit one bike. She wasn’t going to let that stop her though! This amazing person gave up the next couple of hours of her life taking Kelly and her bike back to her home. Unloading her gear then returning to pick me up and take me back to spend the night in her house!! That’s a pretty crazy generous thing to do, make a round trip of 60km just help a couple of tired aussie bike bums out!
Trying the local brews
Even though we’d left Lake Superior, other lakes were still around making the cycling still pretty scenic and enjoyable. The rain not so much. After a very wet muddy day it was nice to meet Warmshowers hosts Mike and Danielle and spend the evening getting tips about cycling in Ottawa and Quebec, having an amazing veggie curry dinner and drinking far too many of Mike’s local beers leaving me with a bit of sore head for the ride next day! I regret nothing. Beer is life.
[ctt template=”8″ link=”5F68E” via=”yes” nofollow=”yes”]Beer is life![/ctt]
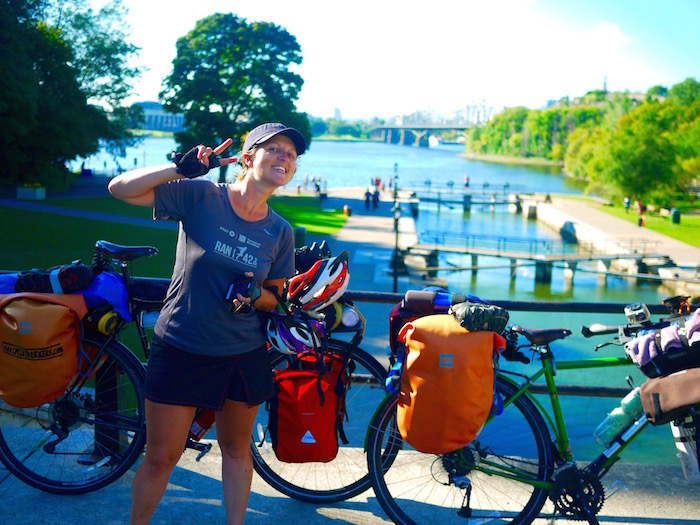
We were finally approaching the capital of this incredible country, Ottawa! Most times approaching a capital city it can be a bit stressful dealing with the traffic and navigating through the chaos. Not in Ottawa! Mike and Danielle had given us a hot tip about a cycle route that led right into the heart of this beautiful gem of a city so we spent most of the day winding along old rail trails and through the cities’ parks and river front cycle paths before meeting our next Warmshowers host. The crazy bike man of Ottawa, Richard!
Ottawa!
The Crazy, bike man!
Richard had an incredible and utterly ridiculous collection of bicycles. Most of which were homemade crazy contraptions such as tall bikes and a convertible tandem recumbent that he had custom built with segments that can be added so his wife and kids can all ride together! He’d even built a custom rack to carry his full sized wooden canoe over his head for short tours!
We spent several days hanging out with Richard and met a group of local bike nuts from the ‘HPVOO’ (human powered vehicles of Ottawa) group for dinner and picnicked with another group from a local bike organization that provides a free space and tools for people to come and work on their bikes. Also did all the touristy things around town, checked out a street party festival and followed Richard around town on his ridiculous gigantic tall bike. Checked out the markets and used our mouths to investigate many local hop filled beverages.
Awesome Bike Stores and more Awesome People
After my piece of shit EVO low rider rack died way back in Manitoba it had been held together with hose clamps and zip ties, but had suffered a final fatal break several days before Ottawa so I was in desperate need of a decent front rack before we could continue. I rode around town in search of a half decent low-rider rack in vain, only finding either the same rack or something very similar and equally as crappily made.
I got talking to a guy called Rodd working at the Cyclery bike shop. This utter rock star of a human being offered to give me his old Blackburn low-rider rack for free! The shop didn’t have anything suitable, but he had exactly what I was after at his house so gave me his address and I swung by and picked it up rom him! What a cool thing to do! Helped me out so much and this rack will be coming with for the rest of the trip as a new member of the cycle trekkers team!!
Pretty obvious… exploring Ontario by bicycle!
Chau Ontatio!
Our time exploring Ontario by bicycle was finally drawing to an end after over a month of pedal powered fun times through this monster province, but we were excited for what was to come. Quebec! Every single Canadian cycle tourist we had met was from Quebec. That has to be a sign that it’s gonna be a sweet place to ride! Thank you Ontario for being so cool and being filled with such helpful generous kind hearted people willing to help two crazy biking fools out! I hope you enjoyed Ontario by bicycle! Now bring on the cheese, wine and maple syrup in Quebec!

 PROS:
PROS: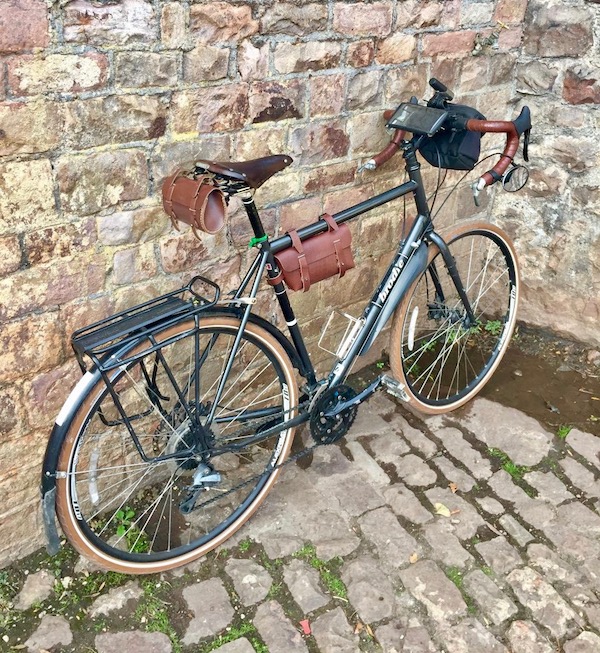
 DURABILITY:
 The straps are made from leather the same thickness as the bag and are wide enough that I doubt they will ever tear or the holes stretch too badly which could be a worry on a thinner strip of leather.
 I can quite easily fit enough snacks for a solid days riding in the Galen Cross Bar bag while stuffing patches, inner tube, a multitool and my brooks seat cover in the Large saddle bag.